Why Size Counts in Timber Flooring

Vienna Woods: Prioritising Quality and Aesthetics

At Vienna Woods, we uphold a strict standard: none of our engineered timber flooring products contain more than 17% short boards. Many of our collections, such as the Foundation Collection and Distilled Collection, feature fixed lengths, ensuring no short boards at all.

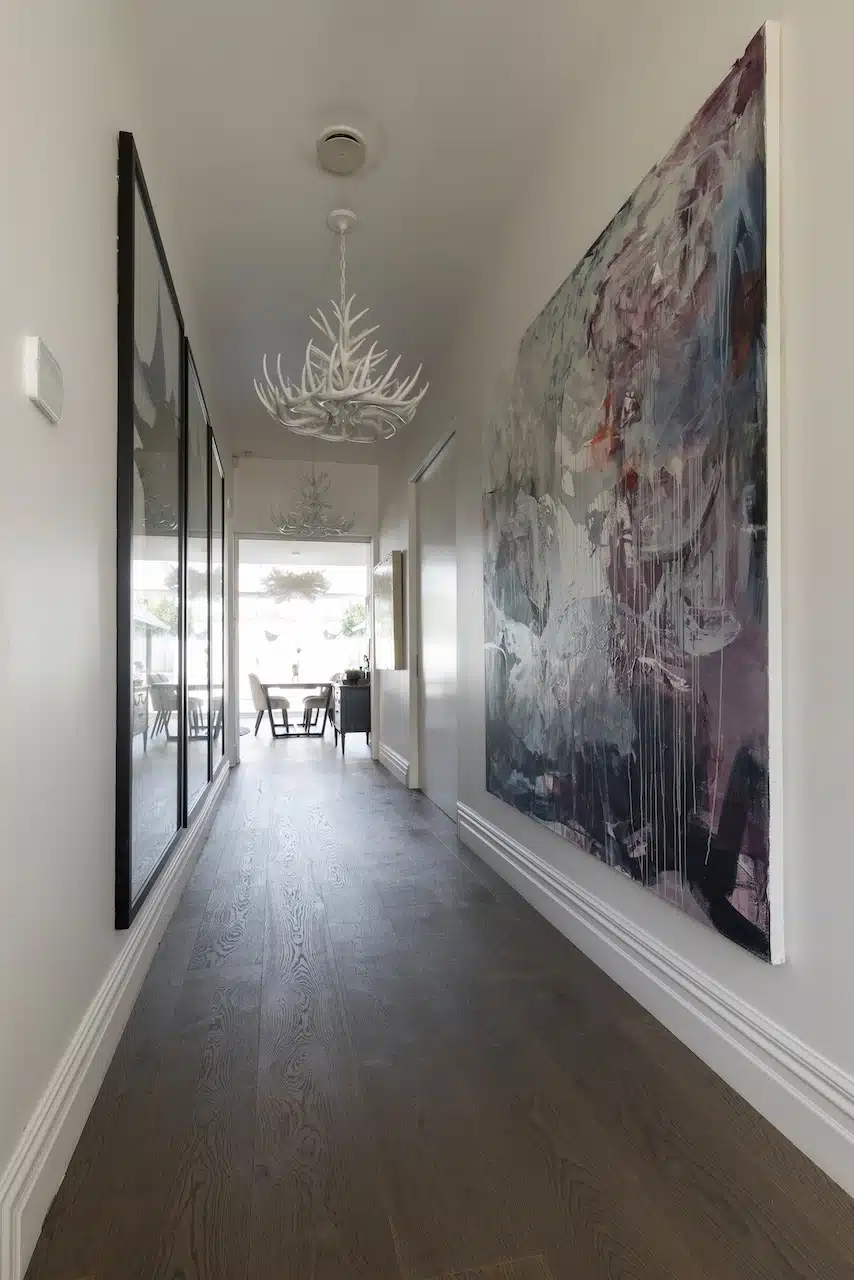
This commitment contrasts with the industry norm, where short board content is usually 25% or even 33% (and sometimes more). Excessive short boards can disrupt the visual harmony of a floor, especially in open-plan spaces.

grey brown wood flooring in hallway

The Rationale Behind Short Boards

Manufacturers include short boards for several reasons:

  • Maximising Timber Yield: Utilising shorter lengths reduces waste during production.

  • Cost Efficiency: Short boards are less expensive to produce and transport.

  • Installation Flexibility: Shorter boards can be useful in smaller spaces or for starting rows.

However, overuse of short boards can compromise the floor’s aesthetics and integrity. 

Dark rich Oak flooring long lengths in open lounge dining and kitchen

The Impact of Excessive Short Boards

Aesthetic Disruption

A high percentage of short boards can lead to a fragmented appearance, breaking the continuity of the wood grain and making spaces feel cluttered.

Increased Head Joints

More short boards mean more joints, which can be visually distracting and may affect the floor’s stability over time.

Installation Challenges

Incorporating numerous short boards can complicate the installation process, potentially leading to increased labour costs and material wastage.

The Advantage of Longer Boards

Longer boards offer several benefits:

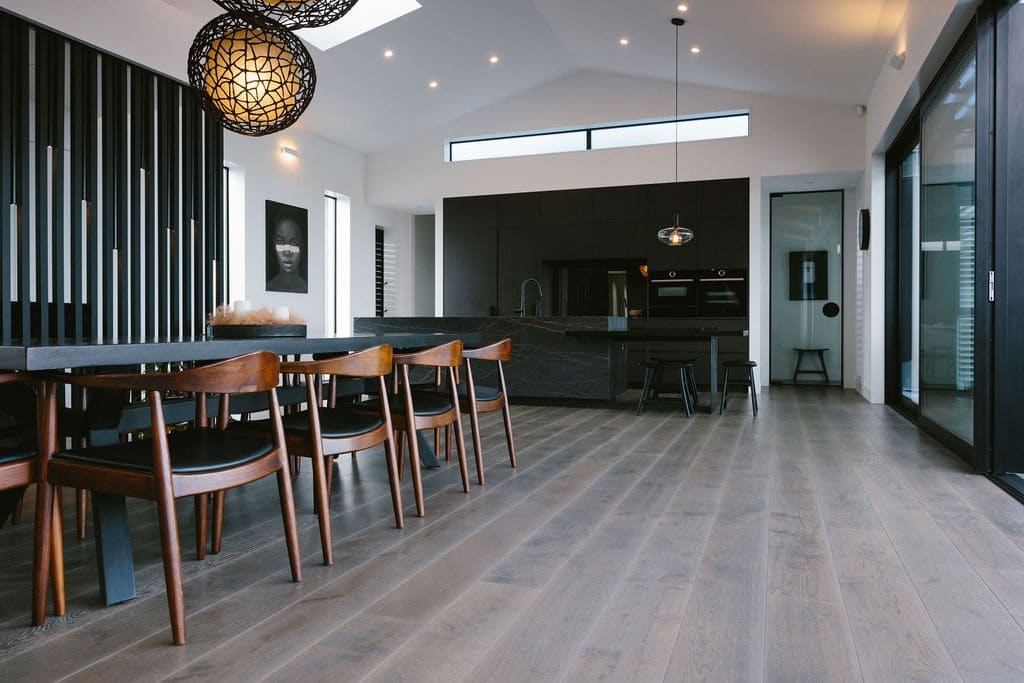
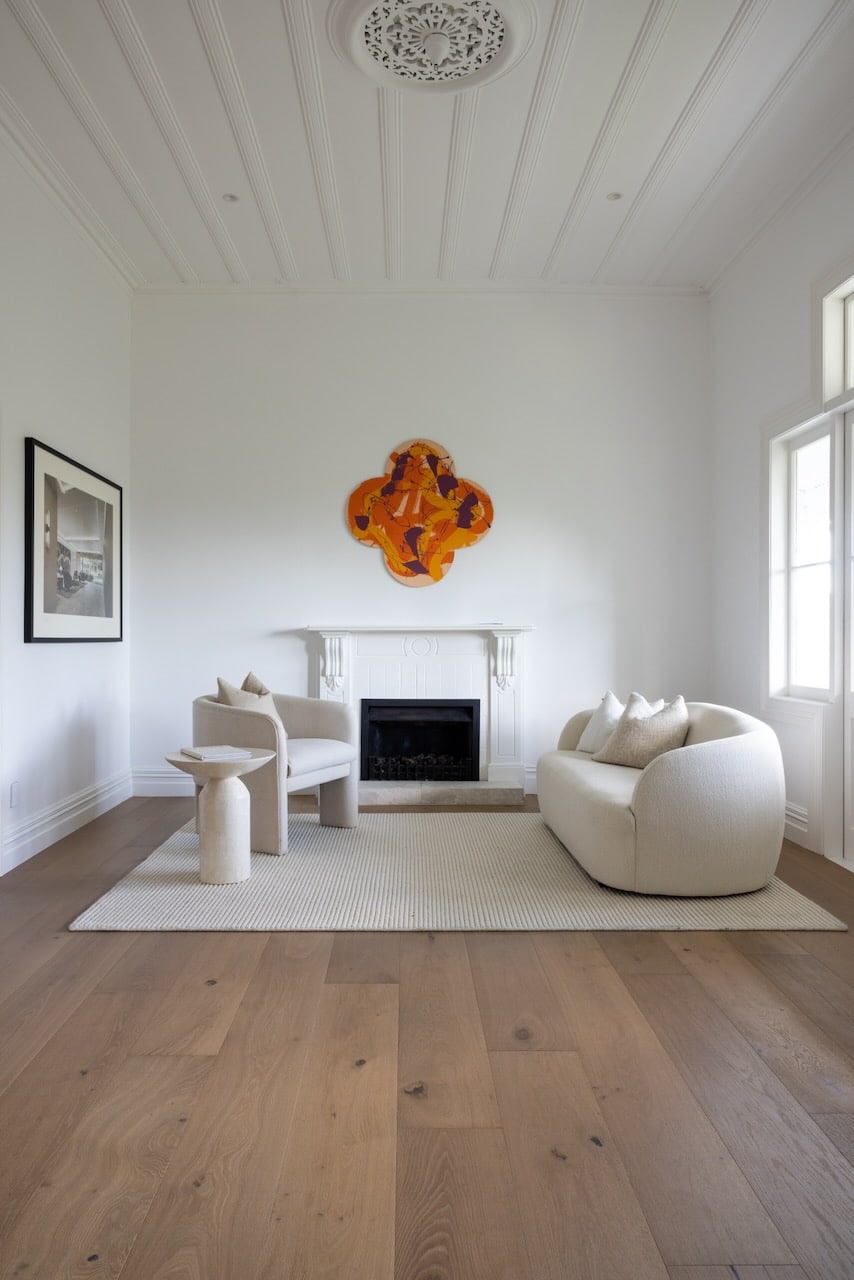
  • Enhanced Visual Flow: They create a seamless look, ideal for open-plan designs.

  • Reduced Joint Visibility: Fewer joints mean a cleaner appearance.

  • Reduced Waste/ Cost: Long boards can provide more efficient consumption of material without compromising on aesthetics.

Vienna Woods’ Commitment to Excellence

Our dedication to quality is evident in our product offerings:

  • Foundation Collection: Features fixed-length boards for a uniform look.

  • Distilled Collection: Offers premium, European-made, long-length boards with distinctive finishes.

  • Icons Collection: Showcases unique designs with longer lengths and strictly controlled short board content.

  • Petit Chateau:  Shows that even cost-effective solutions can still offer quality where it counts (not more than 17% shorts).
  • Chateau Collection:  Extra wide and long planks with interesting stain options and no more than 17% shorts.
  • Admonter:  One of the best engineered flooring manufacturers in the world, Admonter offers strictly fixed lengths only.
Long and wide natural oak wood flooring planks in open lounge

Key Considerations When Selecting Timber Flooring

When evaluating timber flooring options, consider the following:

  1. Short Board Percentage: Aim for products with less than 17% short boards.

  2. Board Lengths: Consider appropriate plank size for the length of your space.

  3. Fixed-Length Options: If it fits with your budget, pt for collections offering fixed-length boards for consistency.

  4. Manufacturer Standards: Choose suppliers adhering to recognised quality standards.

Board length isn’t just a technical detail—it’s a design decision that affects the feel, flow, and finish of every space. Whether you’re specifying for a high-end residential project or curating textures for a commercial interior, understanding how short boards impact the outcome gives you a sharper edge. At Vienna Woods, we’re always happy to talk shop. If you’re navigating flooring choices for a project, or just want to understand the finer details of what sets premium engineered timber apart, we’d love to hear from you.

Understanding Tolerances for Timber Flooring in New Zealand

Understanding tolerances in engineered timber flooring is crucial for both quality results and adherence to New Zealand building standards. Tolerances refer to the allowable variations in measurements and alignments during construction and installation processes. These guidelines ensure that while perfection might not always be attainable, the quality and integrity of the construction are maintained.

The Building Code

In New Zealand, the standards for timber flooring tolerances are well-defined. For instance, the NZS 3604:2011, a key standard for timber-framed buildings, outlines specific tolerances relevant to various aspects of construction, including timber quality and framing. This standard ensures that timber used in buildings, including flooring, meets certain criteria for dimensions and alignment to maintain structural integrity and aesthetic quality.

The Measures for “Flatness” of Overlay Flooring

Specifically, for timber flooring, tolerances include allowances for variations in dimensions, straightness, and levelness. These tolerances are critical to ensure that the flooring not only looks good but also performs well over time. For instance, there are set limits for how much a floor can deviate from being level or how straight the timber must be. These limits are measured in millimeters and are based on the length of the timber used.  Often the tolernces related to “flatness” are expressed by manufacturers of timber flooring.  These are usually represented as a tolerance of devation of 2 or 3mm over 2 or 3 meters.  However standards and tolerances do differ.

Tolerance Tables for Timber Flooring

The Building CodeHub’s “Tolerances tables – Build 184 (2021)” also provides comprehensive information on construction tolerances. It includes details on the permitted variations from given dimensions, the range of variation in maintaining a specified dimension, and variations from location or alignment. Adhering to these tolerances ensures that subsequent trades can achieve quality results and that the final construction meets the desired standards.

Tolerance Tables NZBC Wood Flooring

These tolerances are not just about the technical aspects of construction; they are also about the end-user experience. Floors that are not level or have significant variations can lead to discomfort and even safety issues. Therefore, understanding and applying these tolerances is not just a matter of regulatory compliance but also about delivering a product that meets the highest standards of quality and comfort.

For more detailed and specific information regarding the tolerances in timber flooring, professionals in the industry often refer to the NZS 3604:2011 standard and resources provided by Building CodeHub and BRANZ.

When it comes to engineered timber flooring in New Zealand, adhering to the set tolerances is key. These guidelines ensure that the flooring is not only aesthetically pleasing but also structurally sound and safe for use. By following these standards, builders and installers can provide quality flooring solutions that stand the test of time.

You may also be interested in the impact of E3 on using wood flooring in kitchens (read more here).

A Comprehensive Guide to Glue-Down Wood Floor Installation

Installing a glue-down wood floor is a method that combines stability, durability, and timeless appeal. This process involves adhering the timber directly to the subfloor using a specialised adhesive, creating a seamless and firm finish underfoot. To ensure success, you need careful preparation and precise execution.

Why Choose a Glue-Down Wood Floor?

Glue-down installation offers significant advantages over floating methods. It reduces movement, provides excellent acoustics, and enhances the solid feel of your floor. If you’re weighing your options, check out our comparison of floating and glue-down installationsto decide which method suits your space.

Steps for Installing a Glue-Down Wood Floor

To achieve a flawless result, follow these steps:

  1. Prepare the Subfloor: Ensure the subfloor is level, dry, and free from debris. Subfloor preparation is critical to avoid issues like warping or gapping. For detailed guidance, BRANZ provides excellent resources tailored to New Zealand building standards.
  2. Acclimate the Timber: Allow the timber to acclimatise to the room’s environment before installation. This step reduces movement caused by temperature and humidity changes.
  3. Select the Right Adhesive:  Use a high-quality, low-VOC adhesive to ensure strong bonding while maintaining indoor air quality. Learn more about adhesives that meet health and sustainability standards on the Healthy House Institute.  (Consider Parabond 440 as a suitable eco-friendly timber floor adhesive)
  4. Install with Precision:  Lay the boards meticulously, ensuring even spacing and alignment. Expansion gaps should be left around the room’s perimeter to accommodate natural wood movement.
  5. Finishing Touches:  Many glue-down wood floors come pre-finished, but if you opt for an unfinished floor, you’ll need to sand, stain, and seal it after installation. Visit our floor care guide for maintenance tips post-installation.

Enhancing Your Floor with Design Options

The glue-down method is ideal for complex patterns like herringbone flooring, where stability is paramount. If you’re considering a unique design, our team can help you bring your vision to life.

Maintaining Your Glue-Down Timber Floor

Proper maintenance is key to keeping your floor looking its best. For tips, read our article on oiled timber floors and explore products from trusted brands like Bona for cleaning and care.

By following these steps and using high-quality materials, you can enjoy a durable and beautiful glue-down wood floor that will last for years. For expert advice or inspiration, explore our completed projects showcasing glue-down installations in various settings.

Floating Timber Floor Installation vs Glue-Down Installation

Choosing between a floating timber floor installation and a glue-down method is a key decision for any flooring project. Each approach has unique benefits and suitability depending on your needs. Here’s a comparison to help you decide which option is right for you.

What is a Floating Timber Floor Installation?

A floating timber floor rests on an underlay rather than being fixed directly to the subfloor. The planks click together, creating a stable, secure surface that “floats” above the base.

Benefits of Floating Floors:

  • Ease of Installation: Ideal for DIY projects, thanks to the click-lock mechanism.
  • Cost-Effective: No adhesives or nails are required, reducing materials and labour costs.
  • Subfloor Flexibility: Can be installed over various surfaces, including concrete or tiles.
  • Movability: Easily removed or replaced, making it perfect for renters or those planning future renovations.

Limitations of Floating Floors:

  • Less Soundproof: Without adhesive, sound can transmit through the layers.
  • Not Ideal for Wet Areas: Floating floors may not be suitable for high-moisture spaces like bathrooms.

What is Glue-Down Installation?

Glue-down timber floors are fixed directly to the subfloor with a high-quality adhesive. This creates a seamless bond, enhancing the floor’s stability and longevity.

Benefits of Glue-Down Floors:

  • Superior Stability: The adhesive bond minimises movement and provides a solid feel underfoot.
  • Enhanced Acoustics: The glued surface reduces noise transmission and echoing.
  • Durable and Long-Lasting: Ideal for high-traffic areas and commercial spaces.
  • Better for Wet Areas: With the right sealant, glue-down floors can handle moisture better than floating options.

Limitations of Glue-Down Floors:

  • Complex Installation: Requires professional expertise, especially on uneven subfloors.
  • Higher Costs: Adhesives and skilled labour add to the expense.
  • Permanent Fix: Removing glue-down floors can be difficult and time-consuming.

Which Installation Method is Right for You?

Choose Floating Floors If:

  • You want a quick, cost-effective installation.
  • Your subfloor is even and dry.
  • You need flexibility for future changes or renovations.

Choose Glue-Down Floors If:

  • You require maximum stability and soundproofing.
  • The area experiences heavy foot traffic.
  • You are installing flooring in wet or commercial spaces.

Both floating timber floor installation and glue-down methods have their place in modern flooring. Your choice depends on your project’s requirements, your budget, and the conditions of your subfloor.

When in doubt, consult a flooring expert to ensure the best outcome for your space. No matter the method, high-quality timber floors add beauty, warmth, and value to your home.

You May Be Interested In:

Quiet Floors

CREATING FLOORING FOR LIVING

We’ve worked with top suppliers in Europe to find acoustic systems that genuinely work—making timber floors quieter and more comfortable underfoot.

Acoustic Adhesive

Wood flooring parquet glue

New generation MS hybrid polymer adhesives offer a superior acoustic performance.

Best results are achieved when using Parabond Parquet 480 as a combined moisture barrier & adhesive; the thicker layer of adhesive used to ensure moisture protection dries to a rubber-like consistency, providing excellent acoustic performance.

Parabond is made in Belgium and is imported exclusively by Vienna Woods.

Acoustic Underlay

For peak values in acoustic & load.

SELITPRO® 2.2 mm uses a smart double-foam system that improves both sound performance and strength—ideal for upstairs areas or apartments where noise matters.

The SELITPRO® 2.2 mm AquaStop is equipped with an AquaStop surface and optimally protects the floor against moisture with a sd-value ≥ 200 m.

We also stock 3mm Aquastop underlay.

SELITPRO® underlay is made in Germany and imported exclusively by Vienna Woods.

Mapecem CR

This 4mm thick cork/rubber underlay provides excellent acoustic performance and is an ideal solution when a high performing underlay is required.

We typically glue the underlay to the substrate and then glue the wood flooring directly to the underlay.

Perfect for apartments where a glued down wood floor is desired.

How to Combine Underfloor Heating and Wooden Floors

Pairing underfloor heating and wooden floors creates a warm, inviting, and energy-efficient living space. However, achieving the perfect balance requires careful planning and the right materials. This guide explores best practices and tips to ensure your wooden floors complement your underfloor heating system, all while keeping them durable and beautiful.

Choosing the Right Wooden Flooring for Underfloor Heating

Not all wooden floors are created equal when it comes to underfloor heating. Engineered timber flooring is the best choice due to its stability and resistance to heat-induced warping. Engineered boards consist of multiple layers, making them less prone to expansion and contraction compared to solid wood.

For Kiwi homeowners, engineered timber flooring options, such as those in our Vienna Woods Collection, combine style and practicality. These floors are specifically designed to perform well with modern heating systems.

For further insights, explore Warmup’s guide on using underfloor heating with timber floors, which provides practical advice on material selection.

Best Practices for Installation

To ensure the longevity of your wooden floors and the effectiveness of your underfloor heating system, follow these essential steps:

  • Prepare Your Floors Properly: Acclimate timber to the room’s temperature and humidity for at least 48 hours before installation.
  • Maintain Even Heating: Ensure heating elements cover the entire floor area to avoid cold spots.
  • Monitor Surface Temperatures: Keep floor surface temperatures below 27°C to prevent damage to the timber.
  • Avoid Heat Blockages: Use rugs sparingly, as they can trap heat and lead to uneven flooring conditions.

For more detailed technical tips, visit ThermoSphere’s guide on underfloor heating installation.

Benefits of Underfloor Heating and Wooden Floors

Combining underfloor heating and wooden floors offers both aesthetic and functional benefits:

  1. Unmatched Comfort: Step onto warm, cosy wooden floors even on chilly mornings.
  2. Energy Efficiency: Underfloor heating systems distribute heat evenly, lowering energy consumption.
  3. Timeless Appeal: Wooden floors enhance any room with their natural beauty and warmth.

Discover how underfloor heating integrates seamlessly with different styles of flooring by reading our article on the benefits of engineered timber flooring.

Common Questions

Can all wooden floors be used with underfloor heating?

No, solid wood flooring is generally not recommended. Engineered wood offers better stability and durability when paired with underfloor heating.

What finishes are best for heated wooden floors?

Oil or lacquer finishes work well, provided they are suitable for heated surfaces. Check out our guide to choosing the right finish for your wooden floor for more details.

Final Thoughts

Combining underfloor heating and wooden floors transforms your home into a cosy retreat, all while improving energy efficiency. By choosing high-quality engineered timber and following best practices, you can enjoy warmth and beauty without compromising durability.

For expert advice and a wide selection of suitable flooring, explore our engineered wood flooring options or contact us today to discuss your project.

Looking for a flooring adhesive suitable for underfloor heating?  Try Parabond 440.