How to Identify High-Quality Timber Flooring

Choosing the right timber flooring for your space is a significant decision that requires careful consideration of various factors. High-quality timber flooring not only enhances the aesthetic appeal of your home but also provides durability and long-term value. In this guide, we will explore the essential elements to consider when selecting timber flooring, focusing on factors such as the country of origin, thickness of the lamella, overall thickness, dimensions, finishing processes, timber grading, certifications, and warranties. Understanding these aspects will help you make an informed decision and ensure that your investment stands the test of time.

Country of Origin

The country of origin is a critical factor in determining the quality of timber flooring. Timber sourced from countries with stringent forestry practices, such as France, Germany, and Austria, is known for its superior quality. For example, French oak is valued for its tight grain, large amount of grain movement and consistent colour, making it a popular choice for both modern and traditional interiors. Timber from these regions is often harvested sustainably, ensuring that the wood is mature and robust. Choosing timber from countries with less rigorous standards may result in lower quality flooring, which can affect its durability and appearance over time.

Thickness of Lamella

The lamella refers to the top layer of engineered timber flooring, which is typically made from hardwood. A thicker lamella, ideally between 3mm to 6mm, is crucial for the floor’s longevity. A thicker top layer allows for multiple sandings and refinishes, extending the floor’s lifespan significantly. For instance, a 4mm lamella can be sanded up to three times, ensuring that your floor maintains its appearance for decades. In contrast, a thinner lamella may limit the number of refinishes, reducing the flooring’s overall durability.

Overall Thickness

The overall thickness of engineered timber flooring plays a significant role in its stability and durability. Floors with a thickness of 14mm to 20mm are more resistant to changes in temperature and humidity, making them ideal for the New Zealand climate. Thicker flooring provides better insulation and soundproofing, offering a more solid feel underfoot. Additionally, it contributes to the structural integrity of the floor, reducing the risk of warping or bending over time.

Engineered timber floor types cross-section

Width and Length

The width and length of timber planks can greatly impact the overall look and feel of your flooring. Wider planks, ranging from 180mm to 300mm, create a sense of space and luxury, while longer planks reduce the number of visible joints, offering a seamless appearance. However, it is essential to ensure that these planks are well-milled and stable, as longer lengths can be more prone to warping if not properly manufactured.

Lacquer Curing Process and Lacquer Used

The lacquer curing process is crucial in determining the durability and maintenance needs of your timber flooring. High-quality lacquers, such as those cured using UV or LED technologies, provide a strong, wear-resistant surface that protects the wood from daily wear and tear. The process involves applying multiple layers of lacquer, each cured under UV light, which hardens the finish and enhances the wood’s natural beauty. The type of lacquer used, whether water-based or solvent-based, also affects the floor’s appearance and performance. Water-based lacquers are generally more environmentally friendly, emitting fewer volatile organic compounds (VOCs) and improving indoor air quality.

Oil Used and Oil Curing Process

Oiled finishes offer a more natural look and feel, enhancing the wood’s grain and texture. The type of oil used and the curing process significantly impact the floor’s durability and maintenance. High-quality oils, like hardwax oil, penetrate deeply into the wood, offering protection from within. The curing process may take several days, but the result is a beautiful, easy-to-maintain floor. Regular oil reapplication is necessary to keep the floor in top condition, but this also allows for spot repairs without the need to refinish the entire floor.

close up of dark brown oiled wood floor

Timber Grading

Timber grading refers to the visual characteristics of the wood, including colour variation, knots, and grain patterns. High-quality timber flooring typically falls into prime, select, or rustic grades. Prime grade timber has minimal knots and a uniform appearance, making it ideal for sleek, modern interiors. Select grade offers more variation, with some knots and colour differences, while rustic grade features more prominent knots and natural imperfections, giving the floor a more traditional look. Higher grades, like prime, are often more stable and less prone to movement, providing a long-lasting, high-quality finish.

Certifications

Certifications are essential for ensuring that your timber flooring meets environmental and quality standards. Look for certifications like FSC (Forest Stewardship Council) or PEFC (Programme for the Endorsement of Forest Certification), which guarantee that the timber has been sourced from responsibly managed forests. These certifications ensure that your flooring contributes to sustainable practices and has a minimal environmental impact. Additionally, certifications from independent testing bodies indicate that the flooring complies with international standards for durability, emissions, and safety.

Warranties

A comprehensive warranty is a sign of confidence in the product’s quality. High-quality timber flooring often comes with extensive warranties covering structural integrity, wear resistance, and finish durability. A warranty period of 20 to 30 years suggests that the manufacturer believes in the product’s longevity. Be sure to read the warranty details to understand what is covered, as this can also provide insights into the flooring’s expected performance.

Quality of Textural Wood Treatments

Textural treatments like bandsawing, brushing, or hand-scraping add unique character to timber flooring, enhancing its natural beauty. These treatments should be executed with precision to ensure they do not compromise the wood’s integrity. High-quality treatments will highlight the wood’s grain and natural features without weakening the plank or creating inconsistencies in the finish. Look for uniformity and craftsmanship in these treatments, as poorly executed techniques can lead to uneven wear and reduced longevity.

Additionally, these treatments usually depend on specialised processes to look authentic.  An authentically executed texture treatment will make all the difference when it somes to the look and feel of your flooring.

oiled herringbone timber floor in open kitchen and dining room with high ceiling

Quality Factors and how they Impact Pricing:


Factor Description Impact on Price
Country of Origin Refers to where the timber is sourced. Countries like France and Germany are known for high-quality timber. Higher quality and sustainability standards in countries like France and Germany typically result in a higher price.
Thickness of Lamella The top layer of engineered flooring, usually made of hardwood. A thicker lamella increases the price due to the ability to refinish multiple times, adding longevity and durability.
Overall Thickness Total thickness of the engineered flooring, including all layers. Thicker overall flooring generally commands a higher price due to increased stability, insulation, and durability.
Width and Length The dimensions of the planks, with wider and longer planks being more desirable. Wider and longer planks are more expensive due to the larger, high-quality timber required and the premium aesthetic.
Lacquer Curing Process The method used to harden the lacquer finish, such as UV curing. Advanced curing processes like UV or LED increase the price due to the durability and enhanced finish they provide.
Lacquer Used The type of lacquer applied, including water-based or solvent-based options. High-quality lacquers, particularly low-VOC options, are more costly due to their environmental and health benefits.
Oil Used and Curing Process The type of oil applied for finishing and how it is cured. High-quality oils and longer curing processes increase costs due to the enhanced durability and finish they provide.
Timber Grading Visual and structural characteristics such as knots and grain patterns. Higher grades (e.g., prime) are more expensive due to their uniform appearance and higher structural stability.
Certifications Environmental and quality certifications such as FSC or PEFC. Certified products typically come at a premium due to the assurance of sustainability and adherence to strict standards.
Warranties The duration and coverage of the product’s warranty. Extended warranties increase the price as they reflect the manufacturer’s confidence in the product’s longevity.
Textural Wood Treatments Processes like brushing or hand-scraping that add texture to the wood. High-quality, handcrafted textural treatments are more costly due to the labour and skill involved in achieving them.
Reclaimed wood herringbone silver grey colour close up

When selecting timber flooring in Auckland or anywhere else, understanding these key factors is crucial for making an informed decision. High-quality timber flooring offers not only aesthetic appeal but also durability and long-term value. By considering the country of origin, lamella thickness, overall thickness, dimensions, finishing processes, timber grading, certifications, warranties, and textural treatments, you can ensure that you are choosing a flooring solution that will stand the test of time.

For more insights into choosing the best engineered timber flooring and hardwood floors, feel free to explore our range of high-quality products. At Vienna Woods, we are committed to providing flooring solutions that combine beauty, durability, and sustainability.

By following these guidelines, you can confidently navigate the market for timber flooring in Auckland, ensuring that your investment enhances the beauty and value of your home.

Maximising the Lifespan of Your Timber Floors: Cleaning Essentials

About 80 % of the dust carried into a building is tracked on people’s footwear. Do you know this? This startling statistic underscores the massive impact foot site visitors could have on the cleanliness and toughness of your timber floors. Flooring isn’t always a passive component of your residing or working area; it’s a dynamic element that requires careful attention to maintain its look and structural integrity.

This complete guide can delve into maintaining and cleaning timber floors. Whether you’re a homeowner aiming to maximize the lifespan of your timber floors or maintain their aesthetics, this guide will offer you professional insights and specific guidelines.

Understanding the Importance of Cleaning Timber Floors

Timber is an organic material that expands and contracts with changes in humidity and temperature. If poorly maintained, this will result in troubles, such as warping, cracking, or gaps in the boards.

Cleaning is critical for maintaining longevity, whether it’s engineered timber flooring, solid wooden flooring, or another type. Regular cleaning removes dirt and particles that could scratch and wear down the floor over the years. Proper cleaning helps maintain the timber’s natural appearance and ensures that the floors remain durable and resistant to damage. Regular cleaning can also prevent the accumulation of dirt and moisture. Consistent care also extends the lifespan of wood floors, making them a long-lasting investment in any space.

Tips for Cleaning Timber Floors to Maximise its Lifespan

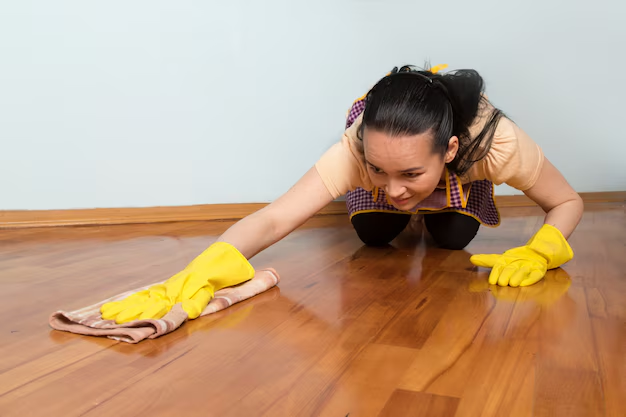
cleaning floor
  1. Daily Maintenance Tips
  • Regular Sweeping and Vacuuming: Daily sweeping or vacuuming with a tender-bristled attachment can prevent dirt, dust, and grit. This helps to prevent sharp items from scratching the wooden surface.
  • Use Doormats: Placing doormats at entrances helps reduce the dust and grit brought indoors, lowering the hazard of debris scratching the timber ground finish.
  • Immediate Spill Cleanup: Because water damage can occur to wood floors, cleaning up messes as soon as possible with a soft, dry cloth is critical. Avoid using too much water, as this might get into the wood and cause warping or swelling.
  1. Weekly and Monthly Cleaning Timber Floors Tips
  • Damp Mopping: Use a well-wrung damp mop for regular cleansing. Avoid soaking the mop in water, as extra moisture can harm the wood. Consider using ADMONTER CLEAN AND CLEAR, specifically formulated for both oiled and lacquered timber floors.
  • Avoid Harsh Chemicals: Steer clean of harsh detergents, ammonia-based totally cleaners, or abrasive cleaners that may strip away the protective finish of the timber.
  • Polishing: Depending on the end of your timber floors, periodic polishing can be beneficial to maintain their luster. Take care to follow utility instructions and use the polish that the manufacturer of the ground recommends. 
  1. Timber Floor Maintenance and Deep Cleaning
  • Professional Cleaning: Periodically, remember to buy quality timber from well-known providers and hire professionals for deep cleansing and preservation. They have specialised tools and products and the understanding to safely clean and rejuvenate timber floors without harming them.  Contact us for timber flooring technical professionals.
  • Recoating or Refinishing: Over time, the protective layer on timber flooring may wear down. Recoating or refinishing the flooring can maintain its appearance and increase its lifespan. Consult with floor professionals to determine the best approach based on your flooring situation.

Essential Tools and Products to Use for Timber Floor Maintenance 

Floor cleaning successfully calls for using the right tools and products to ensure they remain in top-rated condition without causing harm. Here are the critical gear and merchandise you must remember for cleaning timber floors:

  1. Tools:
  • BONA SPRAY MOP: A BONA spray MOP kit is right for damp mopping timber flooring. It is a gentle and efficient alternative to dirt and dust while minimizing water use, vital for protecting wood from moisture damage.
  • Mop Bucket: When damp mopping, use a properly wrung mop to ensure minimum water is applied to the wooden flooring. Excess water can seep into the wood and cause swelling or harm to the finish.
  • Soft Cloths or Towels: Keep smooth, lint-unfastened cloths or towels accessible for cleaning up spills immediately. Avoid using tough or abrasive substances that can scratch the wooden surface.
  • BONA microfiber cleaning pads: Use BONA microfiber cleaning pads to prevent scratches and scuffs while shifting furnishings throughout timber flooring.
  1. Cleaning Products:
  • BONA wood floor cleaner: Choose a Bona wood floor cleaner formulated for wood floors. These cleaners are moderate and effective at removing dirt and filth without destroying the wood’s protective layer.

ADMONTER CLEAN AND CLEAR: If your timber flooring has a oiled finish, use an Admonter clean and clear. Follow the producer’s instructions for application to preserve the wood’s luster and protection.

timber flooring wood-floors herringbone lithuanian oak

Tips for Using Tools and Products:

  1. Proper Use of Tools and Products:
  • Read Labels and Manufacturer Instructions: Always read the labels on cleansing products and follow producer instructions for utilization to avoid negative timber flooring.
  • Test in a Small Area: Before using a new cleaner or product on your entire floor, test it on a small floor to ensure compatibility with your wooden finish.
  • Avoid Excess Water: Timber floors are sensitive to moisture, so use the minimum water when damp mopping. Ensure the mop is accurately wrung to save water from seeping into the wood.
  • Regular Maintenance: Consistent timber floor maintenance and using the right equipment and cleaners are fundamental to maintaining the flooring’s lifespan and beautifying.

Using these critical tools and products efficiently, you can easily maintain your wooden floors, ensuring they remain a beautiful property characteristic for years.

Whether you have solid wood, or engineered timber flooring, buy the best cleaning tools and products from reputable sources like Vienna Woods. Their variety of cleaners is specially formulated to defend and enhance timber surfaces, ensuring the most effective cleanliness without compromising the timber’s integrity. Trust Vienna Woods for quality products that preserve your timber floors’ natural beauty and toughness.

Final Takeaway

Timber floors are an undying need that provides warmth and class to any home. Remember, proper care and attention pay dividends in retaining your investment for many years. Some time and effort to maintain your wood floors will enhance their lifespan and contribute to your home’s overall aesthetic and value. With those cleansing essentials at your disposal, you can confidently experience the iconic beauty and sturdiness of wooden flooring.
Managing Water Damage for Engineered Timber Flooring: When to Replace vs. Repair

Engineered timber flooring is prized for its aesthetic appeal and resilience, but it is susceptible to water damage in severe flooding situations. Understanding when your flooring can be salvaged or must be replaced is crucial for maintaining the integrity and appearance of your floors. Here’s a comprehensive guide to help you navigate the aftermath of water damage, with an emphasis on optimizing for SEO to ensure this information reaches those in need.

When Replacement of Engineered Timber Flooring is Necessary

1. Prolonged Water Exposure: Flooring that has been submerged for an extended period typically absorbs too much moisture to be effectively restored. Water weakens the adhesive bonds and can cause significant swelling and warping of the boards.

2. Contaminated Water Damage: If the flooding involves gray or black water (generally from rivers, sewers, or industrial run-off), the risk of contaminants and bacteria not only damages the floor but can also create health hazards. In these cases, complete replacement is advisable.

3. Subfloor Damage: Engineered floors installed over particleboard or plywood subfloors that have been soaked are likely compromised. These materials often swell and deteriorate when wet, making them structurally unsound.

4. Visible Mold and Mildew: If mold or mildew has developed underneath or on the surface of the flooring due to moisture exposure, replacing the entire section is necessary to prevent health risks and further spread.

Situations Where Engineered Timber Flooring Can Be Salvaged

1. Quick Water Removal: If standing water is quickly removed and drying techniques are employed promptly, the chances of salvaging the floor increase significantly. Use commercial-grade dehumidifiers and fans to accelerate the drying process without causing additional damage through direct exposure.

2. Minor Water Penetration: Floors that have experienced minimal water exposure, where the water has not penetrated beneath the surface layer, can often be dried and repaired. Surface-level issues such as minor warping or discoloration can sometimes be corrected through sanding and refinishing.

3. Adequate Subfloor Ventilation: If the subfloor is well-ventilated and remains structurally sound despite the flood, the engineered flooring on top may be dried effectively and retained. Ensuring good airflow is key to facilitating the drying process.

4. Limited Area of Impact: When damage is localized to a small area of the flooring, it is often possible to replace just the affected sections. Matching new boards to existing flooring can be a feasible solution that preserves the majority of the original installation.

For homeowners and professionals dealing with the aftermath of water damage to engineered timber floors, understanding these key distinctions between when to replace and when to repair can save significant time and resources. If you’re facing decisions about your flooded engineered wood flooring, Vienna Woods offers expert advice and a wide range of high-quality replacement options. For more specific information and advice, you can contact us here.

Understanding and Remedying Cupping in Timber Floors

A Guide for Architects, Interior Designers, and Homeowners

At Vienna Woods, we understand the elegance and durability that timber flooring brings to any space. As experts in providing high-quality engineered oak flooring, we are committed to not only offering the best products but also ensuring their longevity and beauty in your projects and homes. One common issue that needs addressing in timber flooring is ‘cupping’ – a phenomenon that can affect both solid and engineered floors. This article is crafted to help our architects, interior designers, architectural builders, and homeowners understand cupping, its causes, and effective remedies.


What is Cupping in Timber Flooring?

Cupping occurs when the edges of a timber floorboard rise higher than its center, creating a concave shape. This is commonly observed in both solid wood and engineered wood floors. Cupping is often a response to moisture imbalance within the flooring material – a higher moisture content on the bottom surface compared to the top.


Causes of Cupping

  1. Moisture Imbalance: The primary cause of cupping is a difference in moisture levels between the top and bottom of the flooring. This can be due to environmental humidity, spills, or moisture from the subfloor.

  2. Inconsistent Manufactured Moisture Content: Engineered floors are manufactured at specific moisture levels. If these levels are not consistent across the layers of the board, cupping can occur after installation.

  3. Subfloor Conditions: Moist subfloors, especially under bamboo or engineered floors, can transfer moisture to the flooring, leading to cupping.

  4. Environmental Factors: Factors such as sun exposure, heating, and air-conditioning can impact the moisture balance in timber flooring.


Remedies for Cupping

  1. Preventative Measures: The best remedy is prevention. Ensure a continuous plastic damp proof layer is installed between the engineered wood flooring and the subfloor. This helps prevent moisture-related cupping.

  2. Re-sanding and Refinishing: In milder cases, re-sanding the affected floor can even out the surface. However, ensure the moisture content of the floor is stable before sanding.

  3. Floor Replacement: In cases where cupping is extensive and other methods are ineffective, replacing the flooring may be necessary.

  4. Environmental Control: Implementing measures like window treatments and mats can help control the factors contributing to cupping.

  5. Subfloor Assessment: Addressing any issues with the subfloor, including moisture and stability, is crucial in preventing and remedying cupping.


Why This Matters to You

For architects and designers, understanding these issues ensures that your designs maintain their integrity over time. For builders, this knowledge helps in delivering durable and high-quality flooring to your clients. And for homeowners, being informed means you can better care for and maintain the beauty of your timber floors.

At Vienna Woods, we believe in empowering our clients with knowledge. Understanding issues like cupboarding enables you to make informed decisions about your flooring, ensuring lasting beauty and durability. For more information or to explore our range of high-quality timber flooring, visit us at www.viennawoods.co.nz.

How to Deal with Scratches and Dents in Timber Flooring

Timber flooring, with its natural beauty and durability, is a popular choice for many homes and businesses. However, it’s not immune to scratches and dents, which can mar its appearance. Understanding how to effectively deal with these imperfections is crucial for maintaining the aesthetic and longevity of the flooring.


Understanding the Type of Timber Flooring

Before addressing the repairs, it’s essential to identify the type of timber flooring you have, as the repair process can vary significantly. The two main types are oiled and lacquered floors.

  • Oiled Floors: These floors have an oil finish that penetrates the wood, offering a natural look. They’re easier to repair at a small scale because the oil can be reapplied locally.
  • Lacquered Floors: These have a protective coating that sits on top of the wood, creating a glossy and hard finish. While they’re more resistant to damage, repairs often require refinishing a larger area to blend in seamlessly.

Dealing with Scratches

For superficial scratches, a simple DIY solution can often be effective. You can use a wood marker or wax crayon that matches the floor’s color to fill in the scratches.

For small scratches in oiled floors, treating scratches can be as simples as applying a small amount of maintenance oil with a clean cloth, then buffing until dry.

For deeper scratches, especially in oiled floors, sanding the affected area and reapplying oil may be necessary.

Lacquered floors with deep scratches might require the damaged plank to be sanded down and then refinished with lacquer. It’s crucial to ensure the new lacquer matches the rest of the floor.


Fixing Dents

Dents are trickier as they represent actual damage to the wood. For minor dents in oiled floors, steaming the area can raise the grain, but this should be done by a professional, as steaming a timber floor can damage the protective finish.

In lacquered floors, larger dents usually necessitate the replacement of the affected plank. This process can be complex and might require professional help, especially to ensure the new plank matches the existing floor in terms of colour and finish.

Smaller dents can be treated with wax repair.


Professional Help and Maintenance

For significant damage, seeking professional help is advisable. Professionals can assess the extent of the damage and suggest the best course of action, whether it’s repair or replacement.

Regular maintenance can prevent scratches and dents. Use furniture pads, regularly sweep or vacuum the floor, and immediately clean up spills. Placing rugs in high-traffic areas can also be beneficial.  If the floor has an oil finish, then regular maintenance can ensure longevity.


Online Resources

For more detailed guidance, you can refer to the following online resources:

  1. Oiled Floor Care Guide
  2. Lacquered Floor Care Guide 

Maintaining timber flooring requires knowledge of the type of flooring and appropriate repair techniques. Regular maintenance, coupled with timely repairs, can ensure the longevity and beauty of your timber floors. For extensive damage, professional services are recommended.

Are Timber Floors a Good Choice with Pets?

Timber floors can be a good choice with pets, but there are certain considerations to keep in mind before making a decision. Here are some pros and cons to consider when it comes to having timber floors in a home with pets:

**Pros:**

1. **Durability:** High-quality hardwood timber floors can be quite durable and resistant to scratches and dents. Some wood species are harder than others and can better withstand the wear and tear that comes with pet activities.

2. **Easy to Clean:** Timber floors are relatively easy to clean, and pet hair and dander can be easily swept or vacuumed. Accidents can also be cleaned up more easily than on carpets.

3. **Hypoallergenic:** Timber floors are hypoallergenic compared to carpets, which can trap allergens and pet dander. This can be beneficial for both your pet’s health and your own.

4. **Aesthetic Appeal:** Timber floors can add a warm and timeless aesthetic to your home, potentially increasing its value.

**Cons:**

1. **Scratches:** While hardwood floors can be durable, they can still get scratched by pets’ claws, especially if the wood is softer. Regular trimming of your pet’s nails can help mitigate this issue.

2. **Slippery Surface:** Some pets, especially those with little traction on their paws, may find timber floors to be slippery, leading to potential accidents or difficulty in getting around.

3. **Moisture and Stains:** Timber floors are sensitive to moisture, and pet accidents or spills can lead to staining or warping if not cleaned up promptly. Proper sealing and maintenance are crucial.

4. **Noise:** Pets walking on timber floors can generate more noise compared to carpeted floors, which might be a concern in multi-story homes or apartments.

5. **Maintenance:** Timber floors require regular maintenance, including periodic refinishing to maintain their appearance and protect them from wear and tear.

**Tips for Choosing Timber Floors with Pets:**

1. **Choose Harder Wood Species:** Opt for hardwood species that are known for their hardness and durability, such as oak, maple, or hickory.

2. **Consider Finishes:** Choose a finish that offers good scratch resistance and durability, such as a matte or satin finish.

3. **Use Rugs and Mats:** Place area rugs or mats in high-traffic areas and under your pet’s food and water bowls to provide extra protection for the floor and better traction for your pet.

4. **Keep Nails Trimmed:** Regularly trim your pet’s nails to help prevent scratches on the timber floor.

5. **Wipe Up Accidents Quickly:** Accidents should be cleaned up promptly to prevent staining and warping of the wood.

Timber floors can work well with pets, but it’s important to choose the right type of wood, finishes, and maintenance routines to ensure they remain in good condition. If you’re concerned about potential issues, you could also explore other flooring options like laminate or tile, which can mimic the appearance of timber while offering different benefits.