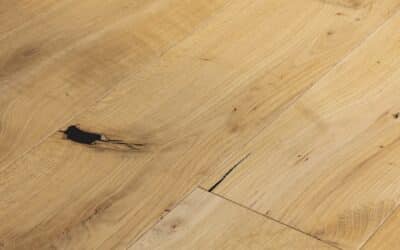

When to Oil Your Timber Floor: The Signs It Is Time
An oiled timber floor is ready for a maintenance coat when it looks dull through the walkways, feels dry or rough underfoot, or water stops beading and starts soaking in. High-traffic areas wear first. Below are the tell-tale signs, a simple water-drop test, and how often to re-oil by traffic.
Six signs an oiled floor is ready for re-oiling
You do not need to strip an oiled floor back to bare timber to keep it looking good. Unlike a lacquer, oil is topped up in place, so the trick is catching the wear early while a light maintenance coat is all it takes. Watch for these six signs, and check the busiest paths first.
The lustre has gone flat
The soft, natural sheen of a freshly oiled floor dulls first in the walking paths. If the timber looks tired and grey next to the untrodden edges of the room, the surface oil is wearing thin.
It feels dry or rough underfoot
Run a bare hand across a busy area. A well-oiled floor feels smooth and slightly fed. If it feels dry, papery or like raw wood, it is asking for a coat.
Water soaks in instead of beading
Spills that once sat on top now darken the timber and soak in. That is the clearest sign the oil barrier has worn down. The water-drop test below confirms it in a minute.
Scratches and scuffs show more
Every floor picks up marks, but on a worn oiled surface they stand out and trap dirt. More visible scuffing than usual means the protective oil has thinned.
Colour looks faded or patchy
Sunlit stretches and daily traffic can lighten the tone over time. A maintenance coat, or a tinted oil applied by a professional, helps even it back up.
It is getting harder to keep clean
As the oil thins, dust and grime cling to the surface and mopping stops lifting them cleanly. Cleaning more often for less result points to a floor that needs feeding.
How to test whether it needs oil: the water-drop test
Not sure? Let the floor tell you. Drip a few drops of clean water onto the boards in a spot that gets plenty of use, then watch what happens.
Water beads and sits
If the drops hold their shape and sit on the surface for a couple of minutes, the oil is still doing its job. Wipe them up. No coat needed yet.
Water soaks in and darkens
If the water spreads, soaks in and leaves a dark patch within a minute or two, the surface oil has worn thin. That area is ready for a maintenance coat.
Test a few spots: a doorway or hallway, the middle of the living room, and somewhere protected like under a rug. The busy areas almost always fail first, and that tells you exactly where to start.
How often should you re-oil an oiled floor?
There is no single number, because it depends on how hard the floor works. Traffic, direct sun, pets and how you clean all move the timeline. The honest answer: re-oil when the signs above show up, not on a fixed calendar.
Most maintenance-oil makers suggest a refresh somewhere between one and three years, but that is a wide window. A busy kitchen or entry can need a touch-up sooner, while a spare bedroom may go far longer. Always follow the recommendation for your specific maintenance oil, and check the product spec that came with your floor.
| Where it is | What tends to happen | Where to start |
|---|---|---|
| Entries, hallways, kitchens | Wear shows here first; grit and spills are constant | Run the water-drop test regularly and coat these first |
| Living and dining rooms | Walking paths and sunlit patches dull ahead of the edges | Watch the main routes and any sun-facing boards |
| Bedrooms and studies | Lightest use, longest between coats | A light refresh when the sheen finally drops |
What to do next
Confirmed it is due? Good news: you rarely need to sand the whole floor. A maintenance coat over a clean, dry surface is usually all it takes, and it is a job many owners do themselves.
Our step-by-step Ciranova maintenance-oil DIY guide walks through prepping and applying the coat. If yours is an Admonter floor, follow the Admonter oiled-floor care routine for the maker’s method. For everything else on keeping timber floors right, start at our maintenance and cleaning hub.

Stretch the time between coats
A little routine care buys months between maintenance coats and keeps the floor looking fresh in the meantime.
Stop grit at the door
Most wear is grit walked in from outside. Mats at every entry, and a no-shoes habit in busy homes, do more than any product.
Clean dry, not wet
Skip the sopping mop. Standing water is an oiled floor’s enemy. Sweep or vacuum, then damp-mop with a cleaner made for oiled timber.
Wipe spills straight away
The longer a spill sits, the more it can soak in as the oil ages. Blot it up quickly, especially in kitchens and near sinks.
Pad the furniture
Felt pads under chairs and table legs stop the scratches that thin the oil in the first place.
Handy next steps
Order free samples
See and feel our oiled European oak in your own light before you commit.
The maintenance guide
Every care and cleaning article for timber floors, gathered in one place.
Apply the oil yourself
The step-by-step DIY method for laying down a maintenance coat.
Common questions
How do I know when my oiled floor needs re-oiling?
Watch for a dull, flat look in the walking paths, a dry or rough feel underfoot, water soaking in instead of beading, and more visible scuffs. The water-drop test is the quickest confirmation: if water soaks in and darkens the timber within a minute or two, that area is ready for a coat.
How often should you oil a timber floor?
It depends on traffic, sunlight and how the floor is cleaned, so there is no fixed number. Maintenance-oil makers commonly suggest somewhere between one and three years, but a busy kitchen may need it sooner and a quiet bedroom far later. Re-oil when the signs appear, and follow your product’s recommendation.
What is the water-drop test?
Drip a few drops of clean water onto a well-used part of the floor. If it beads and sits, the oil is still protecting the timber. If it spreads, soaks in and leaves a dark mark, the surface oil has worn thin and it is time for a maintenance coat.
Can I re-oil just the worn areas?
Often, yes. Oil blends in place, so you can top up the busy paths and doorways without doing the whole room. For an even finish across an open space, many owners coat the full area. Our DIY oil guide covers both.
Do I need to sand before re-oiling?
Usually not. A maintenance coat goes over a clean, dry floor. Light sanding is only needed for deep scratches or a rough patch. Full sanding back to bare timber is a recoat or restoration job, not routine maintenance.
Where can I get help?
For product advice or a floor recommendation, request a quote or talk to our team. For care questions, our maintenance and cleaning hub has the full set of guides, and common queries are answered on our FAQ page.
Keep your oiled floor looking its best
New floor on the way, or planning one? Order free samples to see our oiled European oak in your own space, or talk to us about the right care.