
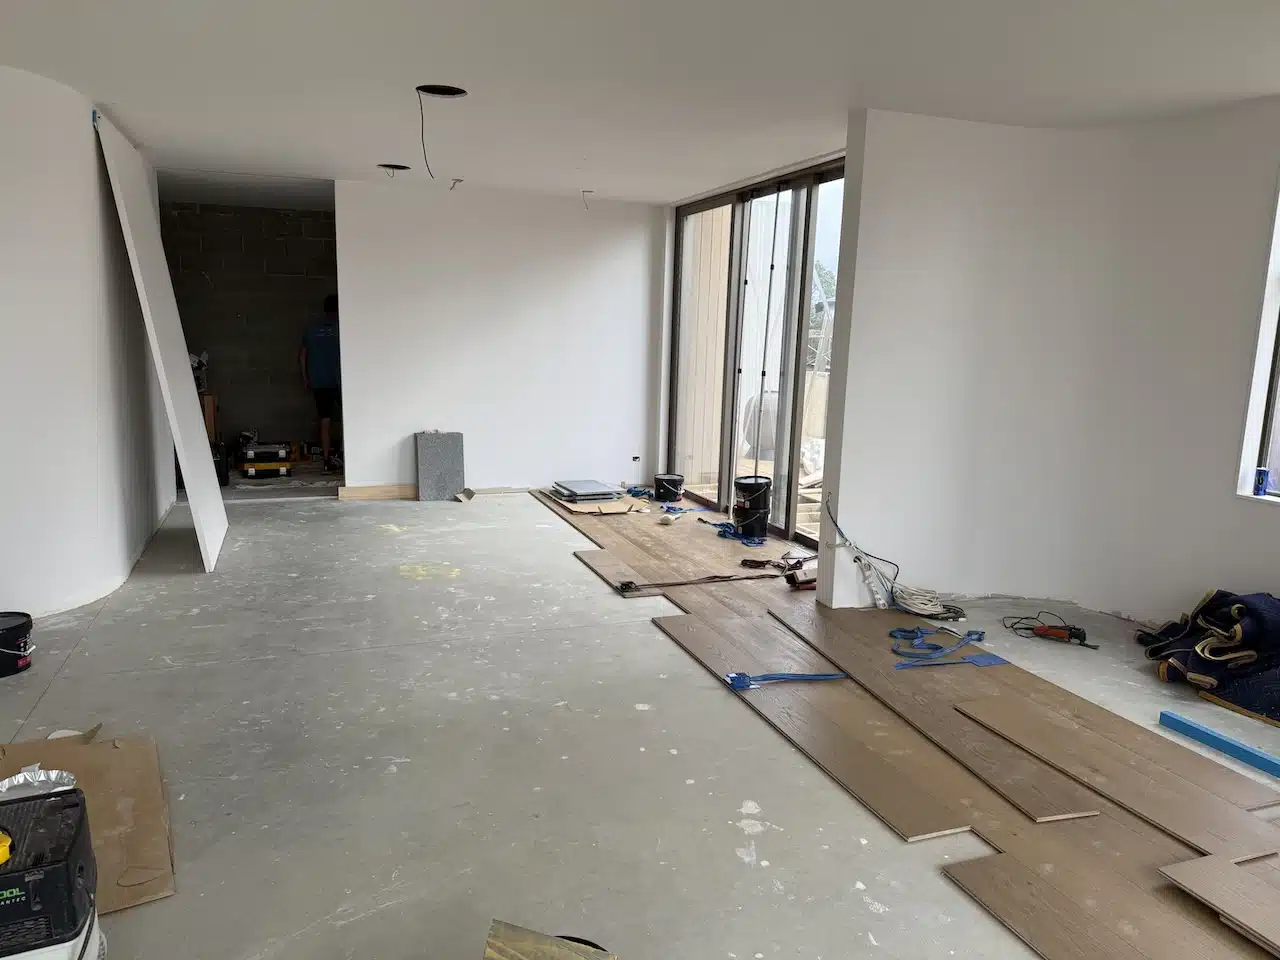
How Engineered Timber Flooring Is Installed in NZ
Engineered oak is stable and forgiving, but a floor lives or dies by the preparation around it. Here is how a quality install is done in New Zealand, from the subfloor to the finished edge, so you know what good looks like.
Installing into an office, restaurant or retail space works to a different specification. See commercial timber flooring for the commercial build-up.
What this guide covers
Vienna Woods supplies engineered European oak and works with a hand‑picked network of trusted installers across New Zealand. We do not lay floors ourselves, but we know exactly what a good install looks like, and we support your installer with the right products and advice for the life of the floor. This guide walks through the method a quality installer follows: choosing glue‑down or floating, preparing the subfloor, managing moisture, acclimatising the timber, and designing in room to move.
Glue-down vs floating: which suits your project
There are two ways to lay engineered timber flooring. The right one depends on your boards, your subfloor and the room.
Bonded to the subfloor
The boards are fixed to the subfloor with a full trowel of flexible adhesive. This gives the most solid, stable floor underfoot.
- Best for concrete slabs and larger areas
- Works well over underfloor heating
- The quietest, most solid result
Vienna Woods specifies a flexible flooring adhesive (Parabond 440) for glue‑down installs. See the adhesive.
Laid over an underlay
The boards lock together and float over an underlay, without being fixed to the subfloor. Faster to lay, with no adhesive to cure.
- Needs a flatter subfloor than glue-down
- For click-profile boards only
- Laid over the underlay the board maker specifies
In an apartment, sound is a property of the whole build-up, designed by an acoustic engineer; see our G6 guide.
Deciding between them? Read floating vs glue-down and our glue-down installation guide.
The three numbers that decide the floor
Most floor problems are not the timber, they are the conditions around it. A good installer checks and records three things before a single board goes down.
Flatness
Maximum deviation under a 3m straightedge. Grind the highs and fill the lows before laying.
Concrete moisture
Measure the slab before laying (an in‑situ probe or carbide reading). A dry‑looking slab is not a dry slab.
Timber difference
On a timber subfloor, the boards and the subfloor should read within 4% of each other before laying.
Record every reading before you lay. It is the single best protection if anything is ever questioned later.
Moisture is the number-one cause of floor failure
The adhesive holds the floor down. It does not hold moisture back. On a concrete slab, the primer and moisture‑barrier system is chosen by the slab’s measured moisture level, not by eye. Have the slab tested, then match the primer to the reading, and never apply a barrier above its rated limit (this matters most over a heated slab). Get this right and the rest of the install is straightforward.
Let the timber settle first
Engineered oak moves less than solid timber, but it still needs to reach the room’s normal conditions before it goes down.
At least 48 hours, in the room
Acclimatise the boards flat, in their packs, in the actual room they will be laid in, off the slab, for 48 hours or more.
Building closed in, wet trades done
Lay only once the building is weather‑tight and wet trades (plaster, paint) are finished. Before and during installation, the room should be at 18–25 °C and 40–60% relative humidity, and as close as practical to how the home will be lived in. If the house will be heated, run the heating beforehand. Follow the product’s own instructions where they differ.
Give the floor room to move
Timber expands and contracts with humidity through the year, so every install needs room to move. This is where good installs are made or lost.
An expansion gap on every edge
Leave a gap around the full perimeter and every fixed object (walls, islands, hearths, pipes). About 10mm in normal rooms, up to 14mm in humid or high‑swing spaces. When in doubt, 14mm.
Trim covers the gap, not the other way around
Size the gap to what the timber needs, then choose skirting or scotia to hide it. Never shrink the gap to suit a thin skirting. Fix skirting to the wall, not the floor.
Break up long runs
Add an intermediate expansion joint once a continuous run passes about 8m. Runs over 15m need project‑specific advice before laying.
Stagger and mix
Stagger board end‑joints by at least 300mm, and mix boards from several packs as you go for a natural spread of colour and grain.
Engineered oak over underfloor heating
Engineered oak suits underfloor heating well, which is one of the reasons it is specified so often in new NZ homes. The part that gets argued about on site is the timing, because there are two heating cycles here, not one, and they belong to different trades. The floor goes down cool, not hot. Over a heated slab, do not trap moisture under the floor with a barrier above its rated limit. More on timber flooring with underfloor heating, including the full commissioning sequence.
The heating installer goes first
Before the timber is anywhere near the site, the system is taken up and back down through a full heating cycle, then switched off and the slab moisture‑tested once it is cool. That job runs on water temperature and belongs to whoever installed the heating. Ask to see the commissioning record.
Dry the subfloor, then switch off
The heating then runs for about two weeks before laying to pull moisture out of the subfloor, with the subfloor never above 27°C, and goes off about two days before the boards go down.
Lay it cool
Our installation documents call for about 15°C at the floor surface during laying and for 48 hours after. A warm slab cures the adhesive too quickly.
Bring it up slowly, once the floor is down
Raise it by no more than 2°C a day over about ten days, then hold for two weeks. The floor surface must not exceed 27°C, read by a floor sensor rather than the room air on the thermostat.
Do you lay flooring before or after kitchen cabinets?
In most homes the cabinets go in first and the floor runs up to them. You are not paying to lay flooring under cabinetry you will never see, and a future kitchen change will not disturb the floor. It can depend on cabinet and appliance heights and whether you might reconfigure later, so talk it through with your installer and kitchen maker early, before either is ordered.
Choosing an installer
Vienna Woods works with a hand‑picked network of experienced flooring installers across New Zealand, and we can connect you with a trusted installer for your project. A good installer will test and record the subfloor flatness and moisture, acclimatise the timber, and set the floor up to move. It is fair to ask to see the moisture and flatness readings taken for your job. Stairs are a specialist job of their own, with different detailing and nosings to a flat floor. If your project includes them, start with our guide to timber stairs.
Installation questions
Can engineered timber flooring be installed over concrete?
Yes. Engineered oak is well suited to concrete slabs, most often glued down. The slab must be flat and its moisture tested first, with the right primer or barrier where needed.
Glue-down or floating, which is better?
Neither is universally better. Glue‑down gives the most solid, stable floor and suits slabs and underfloor heating. Floating is faster to lay but needs click-profile boards and a flatter subfloor. Your subfloor and the room decide it.
How much does installation cost?
Installation is quoted by your installer based on the area, the method and the subfloor. For product and budget guidance, see our timber flooring cost guide and FAQ.
How do I care for the floor once it is laid?
With simple routine care, an engineered oak floor will keep looking its best for many years. See our maintenance and cleaning guide.
Plan your floor
See the boards in your own home, get a sense of budget, and browse the range.
Order free samples
See the real board in your own light before you commit. Free, couriered NZ‑wide.
See what it costs
Our NZ timber flooring price guide, from entry‑level to premium European oak.
Browse the range
Engineered European oak in wide plank, herringbone and textured finishes.
Planning an installation?
Order free samples, or talk to our team about your project and we will connect you with a trusted installer.
Customer Reviews
What homeowners, architects and designers say about working with us.


