Kitchen or flooring first? The short answer.
It depends on the installation method. If your timber floor is being floated, install the kitchen first and run the floor around (and slightly under) the cabinet end panels and kick boards. If the floor is being glued down to the subfloor, install the floor first and sit the kitchen on top.
This is the most common renovation-sequencing question we field at our Newmarket showroom — and it’s the detail most often missed in a build programme. Get it wrong and you’ll see lifting boards, scribed end panels, or extra flooring needed the next time the kitchen layout changes.
| Installation method | Order | Why |
|---|---|---|
| Floating | Kitchen first, then floor | The floor must be free to expand and contract — fixed weight on top can cause boards to lift. |
| Glued down | Floor first, then kitchen | Cleaner finish at the cabinet base, no scribing on site, full coverage if the kitchen ever changes. |
Why does the order matter?
Three things change depending on whether the floor or the cabinets go down first:
- Movement. Engineered timber floors expand and contract with the seasons. A floating floor needs an unbroken expansion gap around the entire perimeter — including under the kitchen cabinets — to move freely.
- Finish quality. Running the floor under the cabinets (glue-down) gives a continuous timber line at the kick board, with no on-site scribing or visible board ends.
- Future flexibility. If the kitchen changes layout in five or ten years, a floor that runs wall-to-wall doesn’t need patching. A floor that stops at the original cabinet footprint usually does.
For most renovations using engineered European oak, we recommend the glue-down approach for these reasons — it’s the spec used in most of our commercial fit-outs and in higher-end residential projects.
Floating installation: install the kitchen first
If you’re floating your timber floor (or installing laminate), install the kitchen cabinets first and lay the floor around them.
A floating floor relies on the boards being free to move as a single sheet. Anything heavy and fixed sitting on top — kitchen cabinetry in particular — anchors that section of the floor and stops it moving with the rest. The result is buckling, gapping, or boards lifting at the joins, especially through the first summer-to-winter cycle.
The standard approach:
- Install the kitchen cabinets onto the bare subfloor, with end panels undercut by the floor thickness plus underlay (typically 16–20mm).
- Run the floating floor up to the cabinet line and slide it under the undercut end panels for a clean finish.
- Leave the kick boards off until the floor is laid, then fit them last so they sit on top of the floor.
- Maintain a 10–12mm expansion gap at all hard edges — walls, columns, doorways — concealed by skirting or scotia.
Free-standing appliances (ovens, dishwashers, fridges) sit on top of the floor — pull-out access stays clean.

Glue-down installation: install the floor first
If your timber floor is being glued directly to the subfloor, we strongly recommend installing the floor first and letting the kitchen cabinets sit on top.
Three reasons:
- Cleaner cabinet base. The cabinet end panels finish on the floor surface, not against it — no on-site scribing, no compromise on the line.
- Full timber coverage. Boards run wall-to-wall. If you change the kitchen layout in future, you’re not patching the floor.
- No expansion conflict. A glued-down floor is bonded to the subfloor and doesn’t need free movement, so kitchen weight on top is irrelevant.
Some builders prefer to install the kitchen first and butt the floor against the cabinet base — usually for programme reasons. It works, but you lose the clean finish and the wall-to-wall coverage. We’d push back on this unless there’s no other option.
Get the subfloor right before either approach
The single biggest cause of failed kitchen flooring installs isn’t the order of work — it’s a subfloor that wasn’t checked properly before the floor went down.
For engineered timber flooring in New Zealand, the working tolerances are:
- Flatness: within 3mm over a 3m straight edge.
- Moisture content: concrete subfloors below 75% RH (BS 8203) or below 4.5% by weight; timber subfloors at 8–14% MC.
- No active rising damp. If you’ve had a leak or a slab pour in the last 90 days, test before specifying.
A subfloor that’s outside tolerance shows up as:
- Hollow or springy spots underfoot, particularly in front of the dishwasher and ovens.
- Boards that creak as you walk past the island.
- Visible unevenness against kitchen joinery, skirtings or door frames.
This is why the installer matters. We’ve seen plenty of beautiful timber compromised by a subfloor nobody checked — and the fix after the fact is always more expensive than the prep would have been.

Renovation sequencing checklist
The right order of operations for most kitchen renovations involving engineered timber flooring:
- Demolition — strip back to the subfloor.
- Plumbing and electrical rough-in — done before anything closes up.
- Subfloor preparation — level, moisture-test, repair where needed.
- Cabinet template / set-out marking on the subfloor.
- Then the order branches:
- Glue-down floor → install the floor, then cabinets on top.
- Floating floor → install the cabinets (end panels undercut), then run the floor around them.
- Skirtings, scotia and kick boards — fitted last in both cases.
- Benchtops, splashbacks, appliances — once the floor and joinery are protected.
Plan the floor delivery to allow at least 5–7 days of acclimatisation on site (in the room it will be installed) before the install date. Engineered European oak ships kiln-dried, but it still needs to settle to the room’s humidity.
What to specify for a kitchen floor
Kitchens are the highest-wear room in most homes — water spills, dropped pots, dragged stools, sun-warmed tile through bifolds, and constant foot traffic. The flooring spec needs to handle all of it.
Three things matter more than the rest:
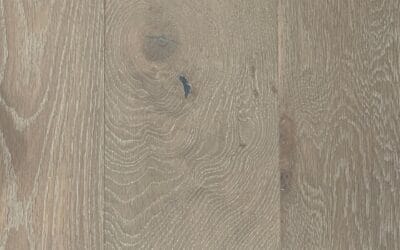
- Engineered, not solid. An engineered board is dimensionally stable across humidity swings; solid timber is not, and a kitchen has more moisture variation than any other room. More on engineered timber flooring NZ.
- A hardwearing finish. A UV-cured lacquered finish is the most practical for kitchens — it shrugs off spills, doesn’t need re-oiling, and is the easiest to keep clean. See our lacquered finish options.
- Format that suits the layout. Wide planks (180mm+) suit open-plan kitchen-living rooms; herringbone parquet works in smaller, formal kitchens where the pattern becomes part of the design.
Wear layer matters too — anything below 3mm is too thin for a kitchen. We supply a 4mm wear layer as standard across our engineered range, which gives at least one full sand-and-refinish over the life of the floor.
Where the order affects the cost
Sequencing affects the cost of a kitchen flooring install in three ways:
- Extra timber, glue-down + floor first: covers the area under the cabinets too. Adds roughly 2–4m² depending on kitchen size, but you only do it once.
- Cabinet undercutting, floating + kitchen first: the joiner needs to undercut end panels and leave kick boards off until the floor is in. Usually a fixed labour add, $200–$400.
- Subfloor remediation: if it’s not flat or dry, that’s fixed before the floor goes down — typically $30–$80/m² depending on what’s needed.
For full pricing across engineered oak supply, installation methods, and format premiums, see our timber flooring cost guide for NZ.

FAQ — kitchen and flooring sequencing
Should I install timber flooring under kitchen cabinets?
If the floor is glued down, yes — run it wall to wall and let the cabinets sit on top. If it’s floated, no — install the cabinets first and run the floor around them, with end panels undercut to take the floor underneath.
Do I need to install the flooring before the dishwasher?
Yes for both methods. Free-standing appliances (dishwashers, ovens, fridges) sit on top of the finished floor so they can be pulled out for cleaning or replacement without lifting boards.
Will I need to replace the floor if I change the kitchen layout later?
Not if it was glued down — the floor runs underneath, so a new layout fits straight on top. With a floating floor that stopped at the original cabinet line, you’ll need to patch in new boards wherever the new layout extends past the old one. Colour matching after a few years is rarely perfect, so this is a real cost to plan for.
What height should the cabinet kick boards be?
Typically 100–150mm, but more importantly the joiner needs to leave them off until the floor is laid (floating method). Kick boards are then fitted on top of the finished floor so the line runs cleanly across both.
Can the floor and the kitchen joinery be the same colour?
They can, but matching exactly is hard — different timber species, finish chemistry and grain direction read differently. Most designers we work with deliberately contrast the two: a warm engineered oak floor against a painted or stained joinery, or vice versa.
How long should the timber acclimatise before installation?
At least 5–7 days in the room it will be installed, in the boxes, with HVAC running at normal occupancy levels. Engineered European oak is more stable than solid, but it still needs to settle to the site’s humidity before it’s nailed or glued in place.
Plan your kitchen flooring with us
We supply and install engineered European oak across Auckland. If you’re sequencing a kitchen renovation and want to get the order right, the install method right, and the spec right — talk to us.
- Request samples and a written quote — see and feel the boards before you specify, with a quote inside two business days.
- Book a Newmarket showroom consultation — bring your plans, we’ll work through the install method and the floor spec with you.